 |
 |
 |
 |
 |
 |
 |
 |
 |
 |
 |
 |
|
Structural Straw
 Back to building with straw
|
|
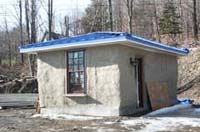
How to build a structural straw shed
Structural straw bale construction is a bearing
wall type of structural system. The straw supports the roof. This type
of construction can be used for large or small structures. This is our
prefered technique for smaller structures. This 12' x 18' garden shed
was build in less than two weeks from start to completion and cost less
than a prefabricated shed of the same size.
|
| |
|
|
|
| |
|
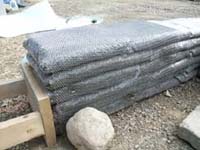
The foundation system uses earth bags (sand bags
filled with dirt). The first course of bags is filled with gravel and
staked into place with rebar. After being placed the bags are tamped down.
The next courses are locked in place by barbed wire placed between them.
Joints are staggered and each layer is tamped. The final course is also
filled with gravel. In this case our foundation wall is 12" above
grade.
The door locations are blocked out with scrap
lumber. The compression system chase is set at the base of the foundation
is set in place. Once the straw is stacked the above grade foundation
is covered with lath and parged with cement based plaster.
|
| |
|
|
|
| |
|
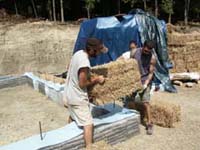
A membrane is set on top of the foundation to
provide a separation between the earth bags and the straw. Rebar stakes
are pounded in to secure the bales to the foundation. The first bale is
set square with the corner of the building.
In this example the bales are stacked on the
side. The bale wall depth is 14" and with plaster the finished thickness
is 16" to 18". The most avalible size of sand-bags is ideal
with the two string bales set in this orientation.
|
| |
|
|
|
| |
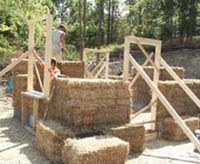 |
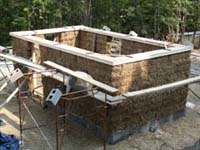
Stacking of bales continues. Doors and windows
have frames set in the wall and secured with dowels into the bales. Every
second course of bales is pinned with two 5' long 1/2" diamater bamboo
stakes. At the corners and in the length of the wall the bales are stacked
with staggered joints. Corners are also pinned in place with shorter bamboo
stakes. Extra bales serve as scaffolding. In this case the dimension of
the building, as well as the door and window locations, were suited to
the size of the bales to reduce the need for custom size bales.
|
| |
|
|
|
| |
 |
Once the wall reached the desired height a roof
plate was constructed to top the wall and provide an even surface to help
with the compression and provide a surface to attach the roof. In this
case we had added a chase at the base of the foundation and another chase
(pipe) on top of the roof plate. A wire cable was run from from top to
bottom and secured with turn-buckles on the interior and exterior. The
turn-buckles were then tensioned and the wall was compressed almost 5"
- or about and 1" per bale. This pre-compression is needed for the
structural straw bale system to reduce settling over time. With the addition
of the top plate and the tensioning the structure becomes very solid and
stable.
|
| |
|
|
|
| |
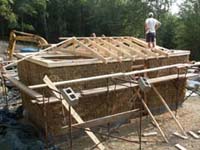 |
The structure for the roof is set on the top plate.
In this case it is framed in place, trusses or other roof structures may
be used. A structural straw bale wall is significantly stronger than a
wood frame wall, resisting both compressive and lateral forces.
|
| |
|
|
|
| |
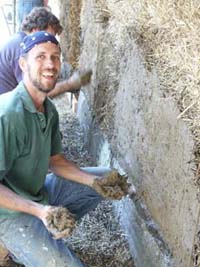 |
Once the straw wall is finished and the joints
are packed with a loose straw and clay mix, the base coat of plaster is
added. Our mix included straw, clay, sand and water and was hand applied
at a plastering workshop.
First the clay is soaked in water then sand is
added and finally straw - chopped with a chipper shredder. Handfuls of
straw are added until the mix is firm and sticky. Test patches with different
proportions of the elements were applied to the wall. Plaster that is
about right will be able to adhere to the straw, not crumble and not be
so sticky that a thick coat will not adhere.
The plaster is pushed into the straw surface with
the palm of the hand and slightly smoothed out. The first layer is left
rough enough for the next layer to be able to adhere. The first layer
is often called the "scratch" coat as it is frequently scored
or scratched in preparation for the next coat.
|
| |
|
|
|
| |
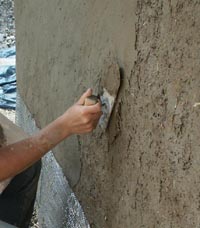 |
The next coat of earthen plaster is added once
the scratch coat has dried. The final coat on the shed was applied with
trowels. The following year a lime plaster finish coat was added.
Doors and windows can be added before or after
the plaster work. During plastering cob shelves and features can be added.
Color can be added to the plaster or applied after.
|
| |
|
|
|
| |
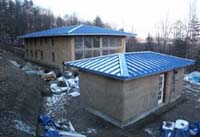 |
The finished shed with the straw bale home underconstruction
in the background. The shed was constructed first to provide for an electrical
and water connection used in subsequent construction. It also provided
storage during construction.
|
| |
|
|
|
| |
|
|
|


