 |
 |
 |
 |
 |
 |
 |
 |
 |
 |
 |
 |
|
Post & Beam Straw
 Back to Building with Straw
|
|
How to build a post & beam straw bale structure
Part Two - Envelope enclosure & plastering
This section will illustrate rough plaster, window
installation, rough mechanical system installation, insulation and enclosure
details for a large post & beam project.
|
| |
|
|
|
| |
|
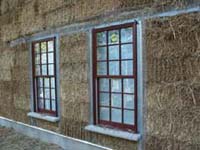
Windows are best fitted after the straw is stacked
and before the plaster work, so the plaster finish will be continuous.
In this case Pella - Architect line windows were used. They are metal
clad wood with good thermal properties. The sills are natural stone which
is locally available. They are very long lasting and low maintenance.
|
| |
|
|
|
| |
|
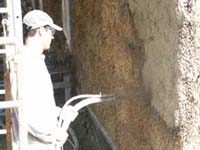
The first coat (scratch coat) of plaster is spray
applied after all the windows are covered as well as anything else that
should not receive plaster (it is messy). The mix in this case included
clay, sand, lime, chopped straw and water. Because of the large amount
of surface to be covered on the exterior and interior walls - this was
the fastest and easist method to use. After spraying, the surface was
smoothed with trowels and scored.
|
| |
|
|
|
| |
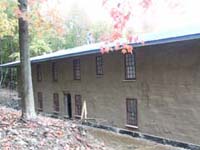 |
This is the finised view of the scratch coat of
plaster. This material does take some time to dry and it was left from
fall to spring, before the final coat of plaster was begun. The occupants
had moved in and the wall was considered completed by code enforcement,
with the finished coat viewed as cosmetic. Because of the lime content
the surface was very hard.
|
| |
|
|
|
| |
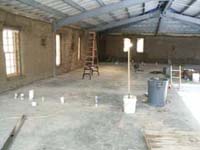 |
The interior plaster was applied with the same
technique and plaster mix as was used for the exterior. The interior finish
plaster continued through the winter.
|
| |
|
|
|
| |
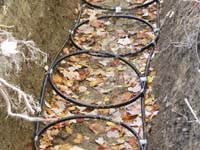 |
Also during the fall the trenches were dug for
geothermal loops and piping layed down. In this area of upstate New York
the trenches were required to be set 5 feet below grade. The equipment
was installed during the winter once the building envelope was completed.
A horizontal closed loop system was used.
|
| |
|
|
|
| |
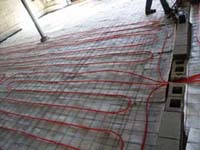 |
The heating system used was radiant system in
the poured concrete floor. Underslab insulation was set down and the radiant
tubes were attached to the reinforcing mesh prior to the slab pour. This
work was done after the plaster on the walls was completed to avoid the
mess of the plaster on the floor.
|
| |
|
|
|
| |
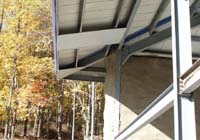 |
Generous 6' overhangs help to protect the plaster
and provide summer shading. The roof is metal and the soffits also use
metal. Because of the ease of recycling metal this was a far better material
choice than the more typical vinyl. Because of the non-standard size eaves,
metal roofing was used to create the soffit.
|
| |
|
|
|
| |
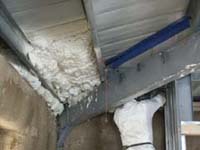 |
Soy based foam in place insulation was applied
to the roof. It expands fo fill every space so it is a good choice to
use with straw bales, since the top of the bale wall is usually a bit
irregular. Because of the use of a standing seam metal roof, there was
no need for sheathing (plywood or osb is typically used for sheathing
the resins used to create this materials produce off-gassing). Because
of the use of foam, a vapor membrane was also not required.
|
| |
|
|
|
| |
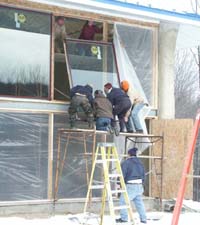 |
The last part of the exterior enclosure was installation
of the large fixed southern windows (all the other windows had been set
prior to the plaster work). The large windows were last to be installed
so the builders could have easy access to the structure allowing large
equipment and materials to be brought in easily.
|
| |
|
|
|
| |
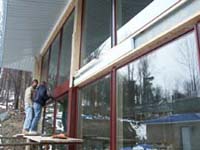 |
The exterior finish of red metal around the windows
is applied to the the structural frame. Insulation is added to the steel
frame on the exterior and interior.
|
| |
|
|
|
| |
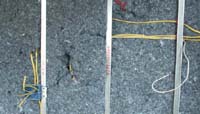 |
Cotton batt insulation was installed in walls
where sound attenuation was desired such as the mechanical room, the bathrooms
& bedrooms.
|
| |
|
|
|
| |
|
Continue
 PartThree - Finish materials & interior details.
|
| |
|
|
|


